Building a concrete pool is a great way to bring the rest and relaxation of a holiday directly into your backyard. However, just like a holiday, building a concrete pool will require a fair bit of planning and preparation.

As Auckland’s leading concrete pool builders, we know what it takes to turn your dreams of poolside lounging into a reality. Before diving headfirst into the process, read our guide on how to install a concrete pool.

Step 1. Location, Location, Location

With concrete pools being a permanent and weather-dependent feature, choosing the location can make or break your installation and should be the first thing you consider. Opt for an area that basks in plenty of sunlight for maximum comfort and sunbathing potential. The shape and size of your pool design should also come into play when choosing the perfect location. Just like that final puzzle piece, you want your new pool to slip seamlessly into the backyard and carving out the right location will ensure it does.

Step 2. Creating a Clear Canvas

The next step is creating a clean canvas for your masterpiece. This process will involve removing trees, grass, and other debris from your chosen area. Once the area is clear, it’s time to break ground on your project and start excavating. Precision is paramount here; the correct depth and well-sloped sides set the stage for a secure foundation.

Step 3. Form a Stable Foundation

With the excavation complete, stabilising the ground is the next crucial step. Utilise a heavy-duty tamper to compact the soil to ensure a stable foundation that withstands the test of time.

After compacting the soil, we recommend adding a layer of gravel or crushed stone to further bolster your foundation’s base. Doing so will help with drainage and prevent the soil from settling over time. These steps will ensure the structure has a strong and stable foundation, essential for its longevity and safety.

Step 4. Install The Bone Structure and Systems

Now that you have a giant hole roughly in the shape of your future pool, it’s time to fill it with all the essential components. The first step will be to box the pool by creating a timber frame of the pool shape to tie the rebar into. Following that, strategically placing the rebar steel to bind the pool concrete shell. Concrete can be susceptible to cracking under tension, so almost all concrete construction is done over a web of rebar to increase its tensile strength.

Before pouring the concrete, all the bones of your plumbing and electrical systems must be installed. With the rebar frame, plumbing, and electrical systems in place, your new pool will begin to take shape.
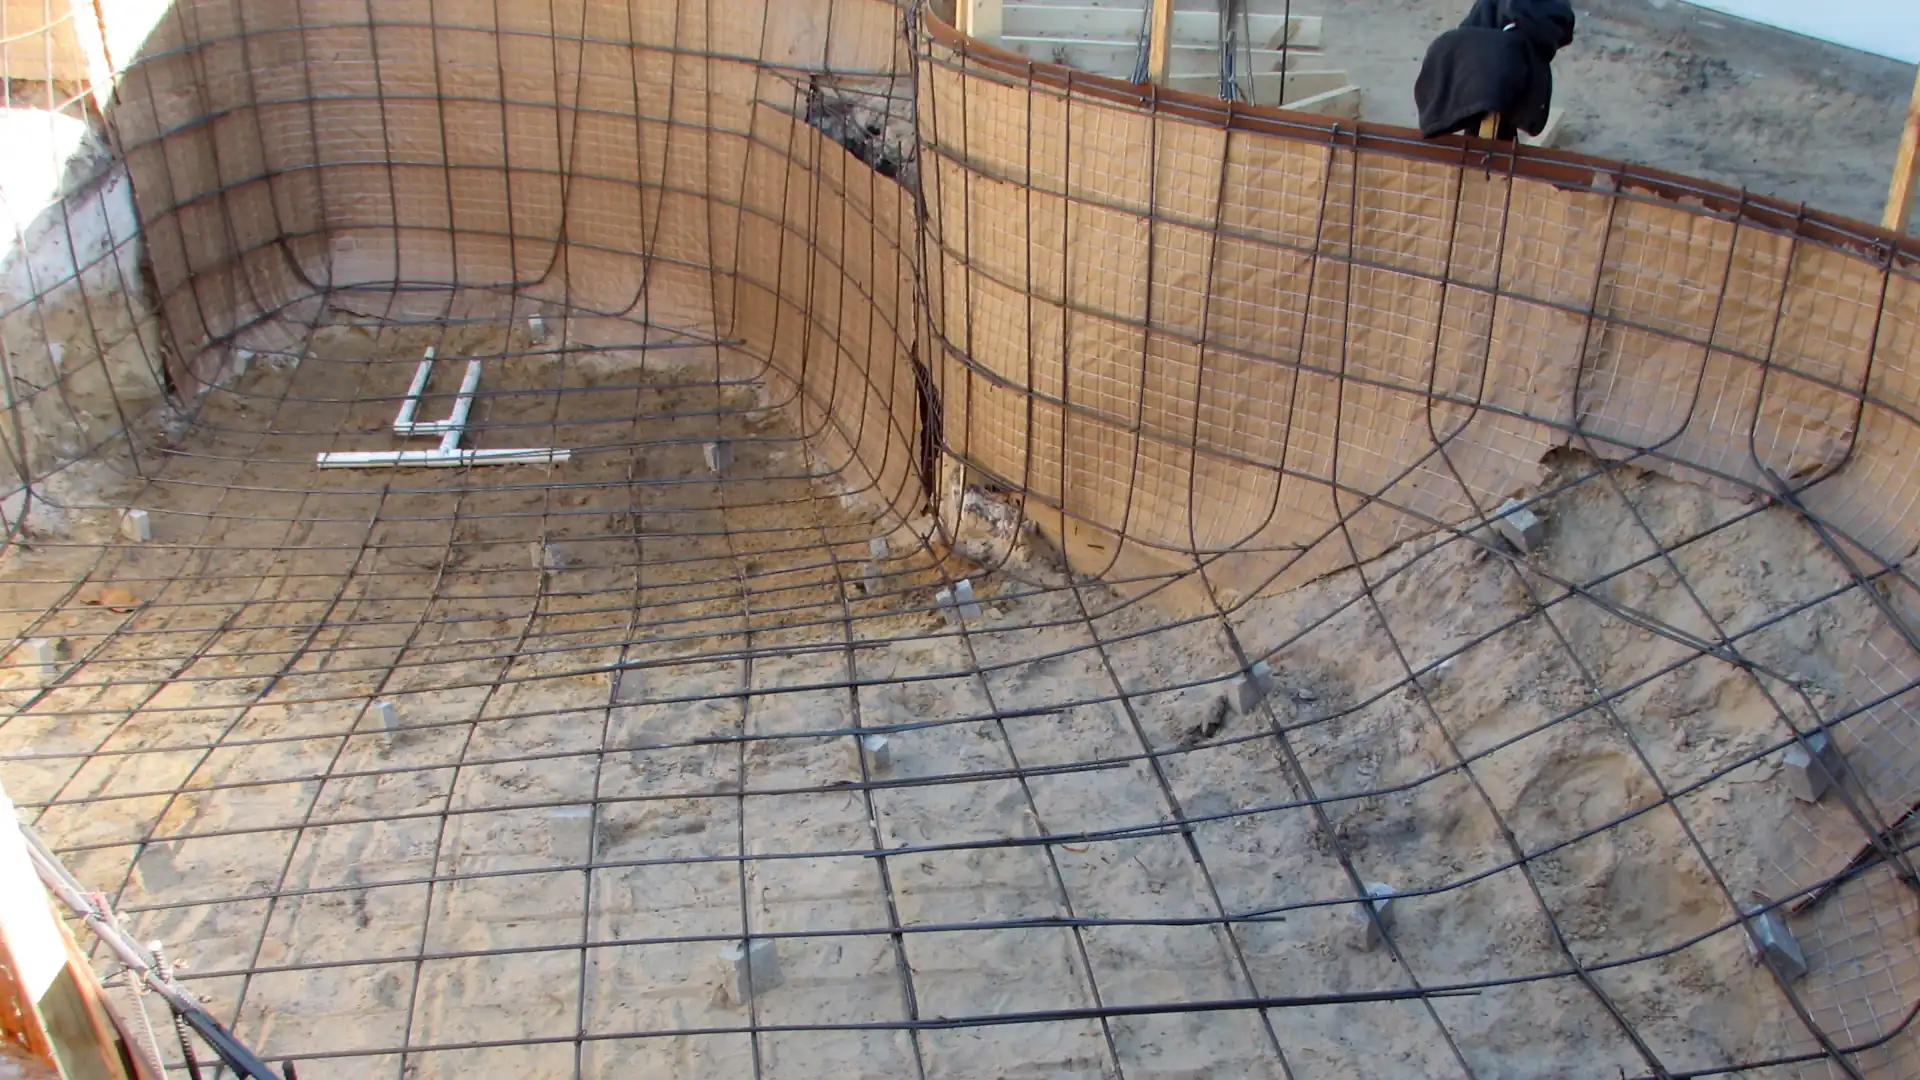
How to install concrete pool - Rebar being installed for a concrete pool<br />

Step 5. Pour the Concrete

With most of the prep work behind you, it’s time to pour the concrete and watch your new pool finally take shape. Two methods are commonly used when pouring concrete for a pool. The first method involves creating a wooden frame to outline the walls and floor of the pool and then pouring the concrete into the frame. The frame can be removed after allowing the concrete to cure, leaving behind a fully-formed concrete pool. The other method which is far superior uses gunite or shotcrete that is sprayed into shape before being finished off by hand with trowels to get a smooth surface.

After concrete is poured or sprayed, it needs time to cure. This process can take as little as a week, but waiting for four weeks is recommended for complete curing. Curing is different from drying, as it involves wetting down the concrete daily to prevent cracking and achieve optimal results.

Step 6. Finishing and Coping

Once you reach this stage, you can add the finishing surface and coping to your pool, bringing your pool one step closer to resembling your initial design. Options for finishing include waterproof paint, plaster, or the luxury of tiled surfaces. Coping the tile around the pool’s lip completes the aesthetic, and your vision will be complete; well, almost!

Step 7. The Final Touches

With coping in place, your attention should be on the surrounding deck or paving for the finishing touches. Enhance your pool area with a carefully designed patio, landscaping, and customisations like water features. Don’t overlook the importance of fencing, often legally required for safety. A well-planned surrounding completes the visual appeal and safety of your concrete oasis.

Step 8. Fill Your New Pool

As the final touches fall into place, it’s time to fill your pool. Whether using a hose or opting for a quicker truck delivery, the pool will take approximately ten days to be ready for swimming. Brushing and water balance are crucial during this period. Daily maintenance ensures the longevity of your investment.

Skip the Steps and Hire a Pro

If all these steps sound a little too hard to handle, even for the keenest of DIYers, you can always call in the pros. Here at Watchman Pools, we know how to install concrete pools and make the whole process as smooth as possible.

For help with everything from concrete pool renovations to full installation, give our team a call today.